
Before starting the tutorial on How to use dashicons in WordPress, you should know some basic things about Dashicons like what is it?, what is the uses of Dashicons, and more.
Dashicons was first introduced in version 3.8 of WordPress. They are those awesome and cool icons you see when you log into your dashboard. By default, the Dashicons CSS file only loads on the back-end of WordPress. So it takes a bit of code to use Dashicons in your front-end posts and pages.
What is Dashicons?
Dashicons is an icon font like FontAwesome that comes bundled with every WordPress install. First, it was introduced in the 3.8 version of WordPress. It’s lightweight and includes enough icons for most users to use on the website to design it. So you could avoid installing a 3rd-party icon set which may affect your site performance.
How To Use Dashicons In WordPress
As I told you in the beginning by default it runs only in the backend of WordPress so first you need to enable Dashicon to use it in the front end of your website here are the steps to use Dashicons in WordPress.
Enabling Dashicon On The WP Front-end
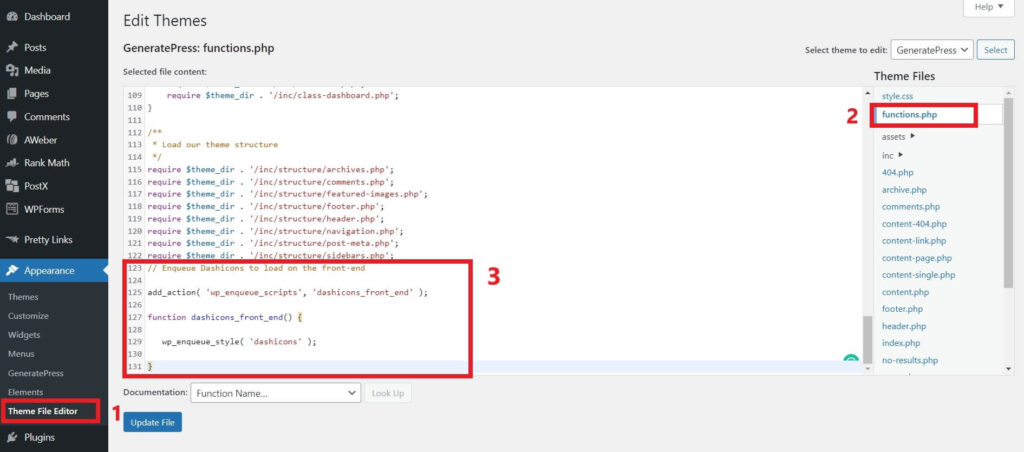
To use Dashicons first you need to make your theme ready for Dashicons. To do that you just need to add the below code in your functions.php file. If you don’t know how to add the code in the function.php file then just follow the below steps.
- Login to your WordPress dashboard
- Go to appearance > theme editor
- Then open the functions.php file
- Scroll to the end of functions.php and add this code
Here is the code
// Enqueue Dashicons to load on the front-end

add_action( 'wp_enqueue_scripts', 'dashicons_front_end' );

function dashicons_front_end() {

   wp_enqueue_style( 'dashicons' );

}
Note- We recommend using a child theme before you edit the functions.php file. If you edit the theme file directly and later on there is a theme update, then the update will override changes you made to functions.php. For this reason, it’s always better to have a child theme.
There is another option too to add this code to your website if you don’t want to use a child theme then you can do it with a WordPress plugin the plugin we are going to use is entirely free you don’t need to pay a single penny for this.
Install The Code Snippets Plugin
Code snippets is a free plugin that you need to install to your WordPress website.
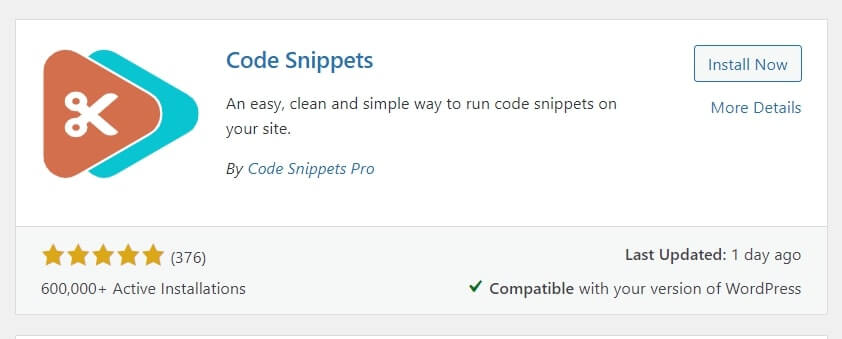
Advantages of the code snippets plugin:
- If you change themes, the code won’t break
- Helps avoid the ‘white screen of death’ if the code has an error
- Store each snippet separately (better organization)
Once you install the plugin to your website, follow the steps below to add Dashicons code.
How to add dashicons with Code Snippets:
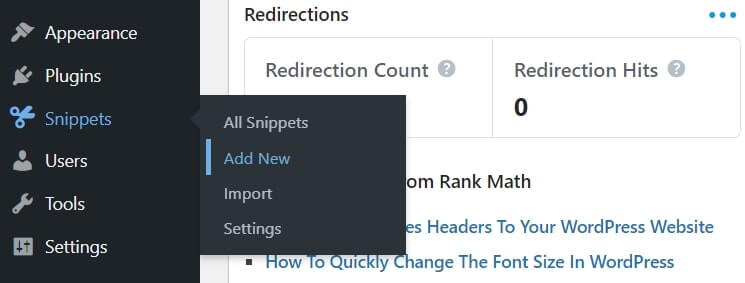
- From the dashboard go to Snippets > Add New
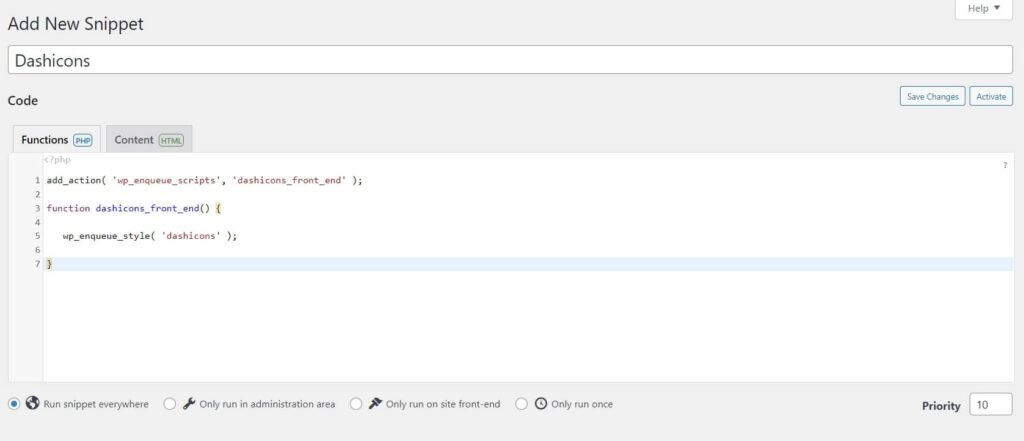
- Give your snippet a title and paste the PHP code
- Choose ‘only run on the front end’ (optimal) or ‘run snippet everywhere’
- Click ‘Activate’
How to use Dashicons on your website
Once you complete the above steps your website is ready to use Dashicons in your content.
Use the .dashicon class with a span element
This is the simplest way to use dashicon on your website. WordPress.org provides a complete library of icons where you can find HTML and CSS code for every icon that you can use on the WordPress website. First got the Dashicon library
- From the library choose the icon that you want to use
- Then click on Copy HTML or Copy CSS depending on what you need.
- A popup window with code will appear. Copy this code and paste this code on your website where you want to use the icon.
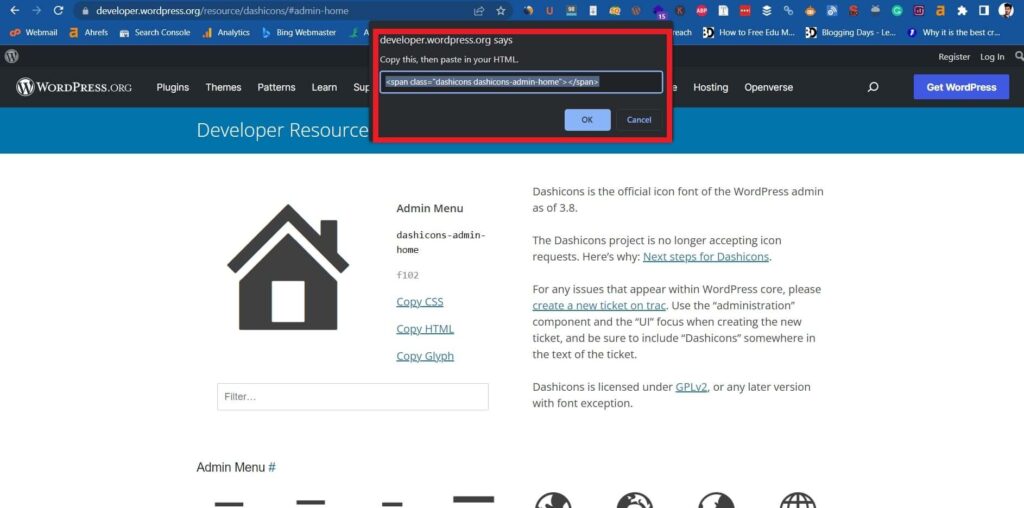
Now let’s see this with an example ” Here I am going to add an icon before heading in an article”.
Open the post editor in WordPress and use the below code to add the icon before any heading
<h2 class="dashicons-before dashicons-smiley">The Atractive Headline</h2>
Or alternatively, you can use this code:
<h2><span class="dashicons dashicons-smiley"></span> The Atractive Headline</h2>
Then once you save your post and reload the page you should see the smiley icon.
This is how you can add icons in your articles I show you how to add them in the heading but with the same steps, you can add icons anywhere in the article.
How To Add Dashicons In The Navigation Menu
Above we see how to add Dashicons in the article now I am going to show you how to add icons in the navigation menu of your website. Adding icons to the menu make it attractive and more clickable.
So to add icons in the navigation menu just follow the below steps.
- Login to your WordPress dashboard
- Go to appearance > Menu
- Add the icon code here that you got from the dashicon library
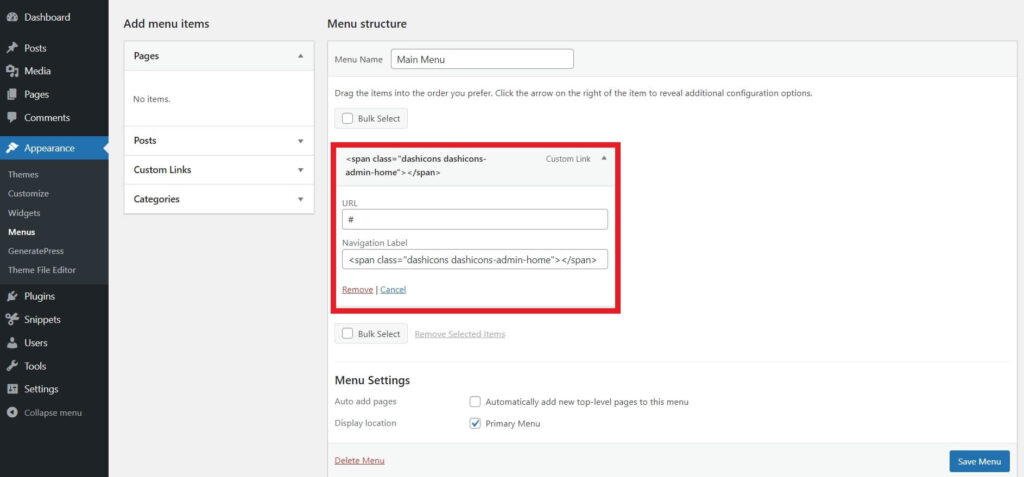
If everything worked correctly you will see the icon displayed on your navigation menu as shown in the below image.
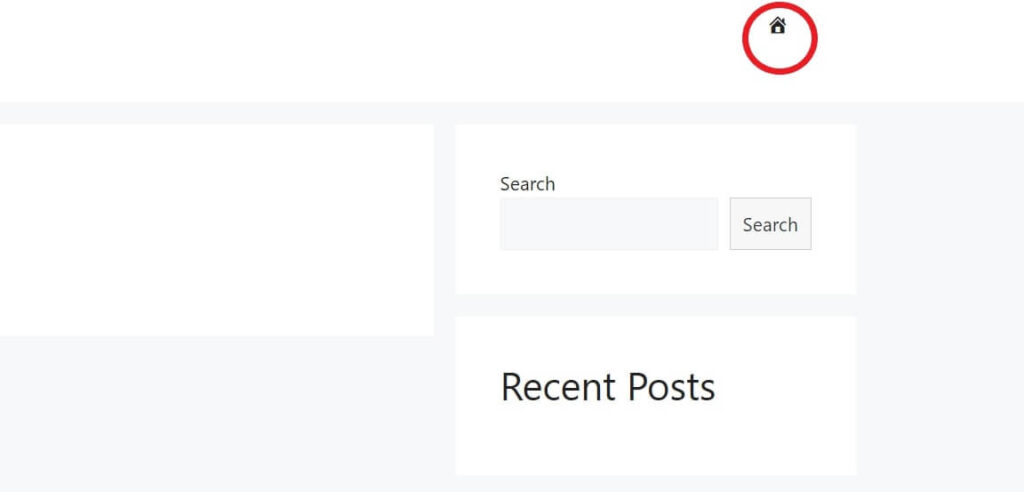
Now we know how to add dashicons to your website pages, articles, and navigation menu. There are some more ways to add these icons to your website like using CSS and more but here I shared the easiest way to add icons to your website.
FAQ – How To Use Dashicons In WordPress
What is dashicon?
Dashicon is the icon font that is officially provided by WordPress first it was launched in the 3.8 version of WordPress.
How do I add Dashicons?
Dashicon by default was added in WordPress but it only runs in the back end to use it in the front end of your website you need to add a basic code in your theme’s functions.php file.
How do I edit Dashicons in WordPress?
It is very simple you will get a complete library of dashicons on wordpress.org here you will get HTML and CSS code to use on your website and you can edit these codes in the way you want.
Some of our must-read article:
Conclusion
Here I shared the step by step guide about how to use dashicons in WordPress. I tried to explain everything in the simplest possible way but if you still have any questions you can ask that in the comment section below.
Also, don’t forget to join our official Facebook group or telegram page where you can talk to like-minded people and industry experts.